

How to set or remove DMA in Windows XP, Windows Vista and Windows 2000.
Some old PC's and CD writers perform better if the DMA setting is removed from the IDE interface. Here are the instructions for setting or removing the DMA setting.
There are also instructions on how to fix a possible problem where setting DMA mode on a drive which you know supports DMA always reverts back to PIO mode, see here.
Before you start.
-
Identify the IDE controller (channel) that your CD writer is connected to.
-
Remove the cover from the PC.
-
If there is one hard drive and the CD writer shares the ribbon cable then the CD writer is connected to the Primary IDE Channel and the device number is 1 (Device numbering starts at 0).
-
If the CD Writer is using its own ribbon cable and it is plugged into a socket on the Mother board that is adjacent to the ribbon cable connected to the hard drive then the CD writer is connected to the Secondary IDE Channel.
If the cable is not connected to any other disk (or CD / DVD) then it is probably the 'Master' device which is device number 0.
To check properly you must look at the jumper settings which are usually at the back of the CD/DVD. MA = Device 0 and SL = Device 1.
-
-
Identify the Device number of the CD writer, if the CD is connected as a primary drive then the device number is 0, if the CD writer is connected as a slave drive the device number is 1.
Instructions
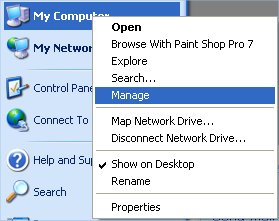
1. Select Start / Right Click 'My Computer' / Select Manage
.
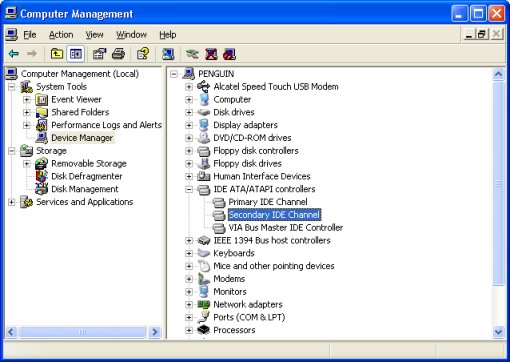
2. Select Device Manager in the left hand pane, expand IDE ATA/ATAPI controllers and double click the appropriate IDE controller, in the example Secondary IDE Channel.
3. Select the appropriate device number and set the Transfer Mode setting to DMA if available (recommended) or PIO Only (use this setting on nly if DMA mode repeatedly fails).
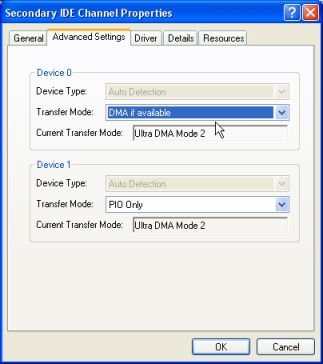
After making the change re-boot, then re-check the settings for a possible problem, below:
If you set the DMA mode and Windows always reverts back to PIO mode, see here.